How to transfer my design to the fabric to embroider
I decided to make my first entry about transfers because there are many options but we are not always going to be able to use our favorite method and because it is also a super important step in embroidery, the finish of our embroidery depends on a good transfer; in haute couture, for example, there are masters who are specialists in transferring designs to fabrics.
The chosen technique will depend on many factors such as the type and color of the fabric, details of the design and permanence of the transfer marks, among others. This last factor is the one that I will use to group the different techniques that I will mention below.
On the one hand we have the transfers that leave permanent marks on the fabric, they can be very practical but I have to make sure without any doubt that I can cover them with embroidery. The other group will be the transfers that in one way or another I will be able to remove from the fabric once I finish embroidering.
Group 1. Leaves permanent marks on fabric.

One that is super easy to use and obtain is tailoring tracing paper, known in Lima as Calcatex, it comes in various colors, including white, so it can also be used for black fabrics. Make sure you make continuous and precise lines, if you make a mistake do not correct it unless you are sure you will cover the marks with the embroidery, remember that this method leaves permanent marks on the fabric.
Another simple and practical method is the pencil that is transferred with heat, ironing the paper against the fabric; like the previous ones, it works well with light and smooth fabrics. I consider it to be practical for simple designs without much detail; the marks can be a bit thick and you should make sure to cover them with the embroidery. You must also consider that you are going to transfer the design inverted, so if it is a text, for example, you must make the strokes on the reverse so that when transferring it is in the correct direction.
Another method that leaves permanent marks is the transfer using alvanene, vegetal or Canson paper (many of us in Lima know it that way and when I was a girl I used to make first communion and baptism cards on this “parchment” paper to sell) and benzine or acetone. Works on light and plain fabrics; I like it because it leaves very fine lines and allows many details. The design can be printed on paper using a laser printer and transferred as quickly as possible so that the printing ink is fresh and transfers to the fabric more easily. You can also trace the drawing with a 5B to 8B drawing pencil. You must wet the fabric with benzine using a cotton cloth (I recommend wearing gloves and doing it in a ventilated place) and transfer by pressing with the back of scissors or some similar instrument on the back of the paper resting on the fabric. Note that you will also be transferring the design upside down. If you're using an 8B drawing pencil you won't necessarily need the benzine but I recommend using a fixative to seal the charcoal in the pencil. I do not recommend it if you are going to embroider with very light colors.
A very old method is known as Prick & Pounce. It consists of making holes throughout the design with an awl and then dusting with grit using a speck so that it passes through the holes into the fabric. There is the possibility of using black charcoal or white grit depending on whether my fabric is light or dark and this is an advantage over other methods. The downside is that it is much more laborious. On the other hand, it is not such an easy method to obtain, I bought my kit at Hand & Lock.
Group 2. Marks can be removed from the fabric.

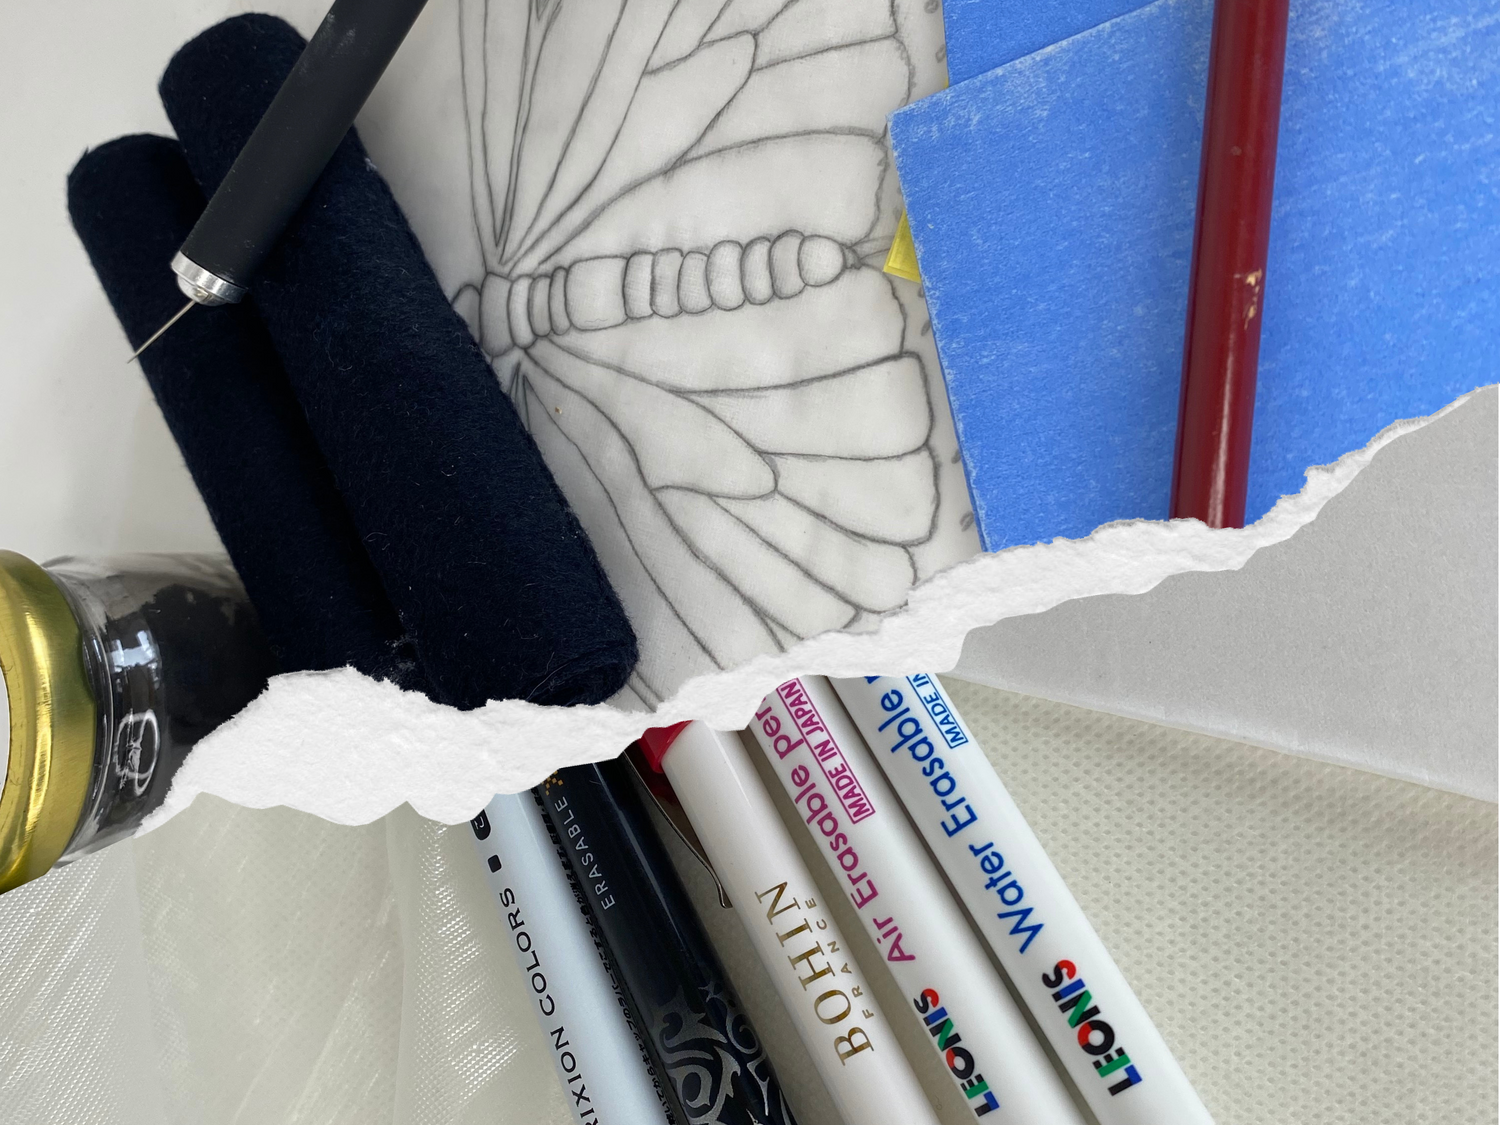
Another quite practical method is to use a water-soluble marker -provided that you are going to be able to wash the embroidery later, which is not the case, for example, if it is a goldwork job-, a marker that is erased over time in the air - for strokes that you are going to embroider in the next hour after the stroke is made- and/or thermosensitive marker/pen such as Pilot's Frixion that can be removed with steam from the iron or hair dryer. In all cases you can do a freehand drawing, children are experts at this and it's a nice embroidery idea; or transfer the design from paper using a window (I recommend it for small designs without much detail because believe me arms gets tired), a glass table with a lamp under it, a light table or a light tablet for transfers. In all cases, I recommend you to secure the drawing and the fabric with tape, fixing them so that they do not move and the transfer is perfect. All of these methods work very well with light-colored fabrics that let the light through and are relatively smooth, linens and cottons for example. I always prefer to embroider on natural fabrics and I try to stay away from synthetic ones.
Two methods that I find super helpful are water soluble stabilizers. One is self-adhesive and sticks well to plain fabrics, plus it can be printed so it's great for small, detailed designs. One thing that I find against this method is that the needle becomes sticky and this is particularly uncomfortable for me, what I do to try and bypass this issue is use it only to outline the design, I remove the stabilizer with water and once the fabric dries I continue with the rest of the embroidery. The other is more like a plastic that must be sewn to the fabric that I want to embroider using a basting stitch that can later be removed. It is super useful for thick or textured fabrics such as a sweater, it is better to make simple designs without much detail. Once the embroidery is finished, wash it with water so that it dissolves like jelly and voilà your embroidery!
The last method I want to talk about is transferring the design by sewing/embroidering on the fabric; so how is this? What you must do first is transfer your design to tissue paper also known as silk paper; then you attach it to the fabric already tauten in the frame with pins and then either using a traditional needle or the luneville crochet you outline the entire design, ideally using a color thread very similar to the fabric so that it is not very noticeable. Finally, tear the tissue paper to remove it carefully and if necessary help yourself with tweezers.
That's all dear readers! If you have any doubts/questions/comments please do not hesitate to write me, without forgetting the hello, please and thank you, for charity please! Otherwise, my defenses go down and I don't have the strength left to answer them, okay? Stay cool! XOXO
Leave a comment